 |
| It's a bit dodgy, this process. |
Sew the lining assembly to the jacket at the collar, stitching over the previous stitch line.
Clip the collar/body and collar/lining seam allowances as needed.
Your jacket assembly should now look like this:
To attach the bottom of the bib facing assembly to the lower bib panel, first pull the bib facing assembly out from the jacket body a bit.
Turn the bib facing assembly so that its wrong side and the right side of the jacket are together.
Twist the bib facing assembly around one more time so the bottom of the bib facing assembly and the bottom of the lower bib panel are right sides together.
Pull the middle front body panel, zipper trim, and front lining out of the way, then pin the bottom of the lower bib panel and bottom of the bib facing assembly together.
Sew the lower bib panel to the lower bib panel facing with ⅜" seam allowance, right sides together.
Turn (or, rather, "unwind") the front lining assembly back to the inside of the jacket and gently press the bottom of the bib/bib facing assembly.
Pin the bib assembly and bib facing assembly together along the center front.
Sew the two together ⅜" from the center edge, over and completing the previous stitch line (i.e. sew the zipper trim all the way to the bottom this time).
Cut the lower front trims down to size and liberally apply liquid fray preventer.
Sew the front hem facing (piece O) to the back hem facing (piece P).
Press seam allowances open.
Repeat for the other side.
Sew the two hem facing assemblies together along the center back.
Press seam allowances open.
Sew the hem facing assembly to the bottom of the jacket body along the front and lower edges, right sides together.
NOTE: The front edges of the hem facing assembly have ⅝" seam allowance, and we recommend using a zipper/piping foot to ensure the stitch line is exactly flush with the centermost edge of the trim. Also note that the front body/hem facing stitch line should complete (and slightly overlap) the original bib assembly/body stitch line that was previously left un-sewn at the bottom.
Trim and notch the seam allowances as needed (especially at the bottom of the front corners), then turn the bottom of the jacket/hem facings right sides out and press.
TIP: Practice on some scraps a few times before trying to turn that corner; the fabrics, underlining, and especially the ⅝" trim can really accumulate into some bulk that resists turning into a nice, sharp corner. Compare our very first practice attempt with our second:
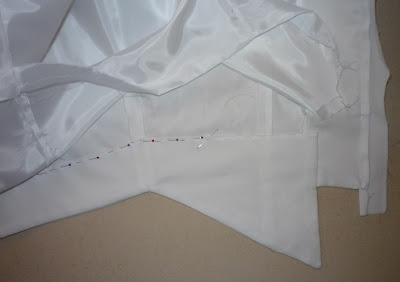
Hand sew the top edge of the hem facing assembly to the jacket body's underlining, being careful not to stitch all the way through the layers to the outside of the garment.
Pin the lower edge of the lining into place so that the raw edge (which was previously pressed upward) is flush with the upper edge of the hem facing assembly (which was just secured to the jacket underlining).
Hand sew the lining to the hem facings along the basting stitch, taking care to only catch the inner layer of the lining and again being careful not to stitch all the way through the layers to the outside of the garment.
Press the centermost un-sewn, excess length of lining downward, forming a jump pleat.
Slip stitch the front edge of the lining to the front facing along the lower edge and press.


No comments:
Post a Comment